How to Register Your TM SIM Card: A Step-by-Step Guide
Getting your TM SIM card registered is an essential and exciting process that ensures your seamless participation in TM’s services. Whether you’re gearing up to enjoy internet browsing or access TM’s other features, the first step is to register your SIM. This guide is here to cover everything you need to know about registration—from what it involves to why it’s important.
The process itself is straightforward but crucial; without registration, you won’t be able to fully unlock all that TM offers. Once involved, you’ll also be contributing to the network’s history of providing secure and reliable communication. By registering, not only do you enjoy uninterrupted service, but you also safeguard your number for future use. TM has made the process easy to follow, so no need to worry—you’ll be covered every step of the way!
A Brief Look at TM’s Journey
TM, also known as Talk ‘N Text, started as a mobile network in the Philippines back in 2000. It was founded with a clear goal: to provide affordable communication services to its users. Over the years, TM has evolved, adding new programs and features to meet the ever-changing needs of its budget-conscious users. Known for its reliable service, TM has built a reputation for offering great value and unique offerings that cater to those looking for quality without breaking the bank. As one of the key players in the country, TM continues to serve its users with dedication and innovation.
What Does TM SIM Registration Mean?
When you officially register your TM SIM, you are making sure your SIM card is linked to your account and keeping it secure as required by law. By signing up, you help prevent fraud and contribute to the overall security of the network. This process not only ensures quality service for you but also protects your personal data. Completing the registration is important for every user to enjoy the full benefits of TM and to stay compliant with regulations that safeguard both the network and its customers.
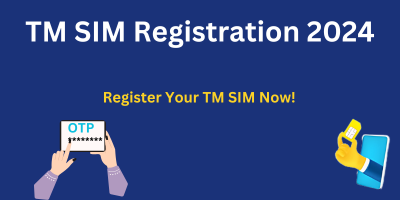
Easy Steps for TM SIM Registration Online
- Click the Register Now button or visit the link for TM SIM Registration on the official website.
- Accept the necessary cookies to proceed.
- Fill out the form with your mobile number and wait for the OTP sent via SMS.
- Enter the OTP within 5 minutes to complete the first stage of verification.
- Provide your legal information and select your ID Type (such as a government-issued ID card).
- Upload a photo of your ID to finish the verification process.
- Submit the form and wait for confirmation—congratulations, you are now registered!
- For faster access, you can also scan the QR code to directly access the official site and follow the steps.
Why You Should Register Your TM SIM Card
- Register your TM SIM through the app or follow the registration instructions by downloading the GlobeOne app from the Play Store.
- Launch the application and in the dashboard, locate the Register Your SIM option.
- Add your Cell Phone Number, then click the Register button.
- I Accept and agree to the necessary cookies before proceeding.
- An OTP will be sent to your phone number, which must be entered within 5 minutes.
- Hit Let’s Start and repeat the process if needed.
- Complete the steps by providing the required, accurate details in the form, such as your ID Type, ID number, and a selfie.
- Next, tick the checkbox to accept the terms and conditions, and move forward.
- Once done, you will be set and successfully registered.
- Failing to register your TM SIM card can result in it being permanently blocked, leading to potential loss of data.
Important Reasons to Register Your TM SIM Card
- The Philippine government requires registration of all SIM cards to prevent you from losing your number.
- By registering, you can stay safe and protect yourself from fraud and spam.
- Your information will be securely listed with TM, which means they can help if anything goes wrong.
- Once registered, you will enjoy better services with fewer problems as a subscriber.
- After you sign up, you might even get a special offer from TM for completing the process.
What Happens if You Don’t Register Your TM SIM?
- Failing to register your TM SIM can have serious consequences, including the deactivation of your SIM.
- You might miss important messages and updates related to your account.
- You could encounter problems with essential services like online banking or accessing information from your apps.
Requirements for TM SIM Registration
- Before you dive into the registration process, it’s essential to gather all the necessary documents.
- The technique is simple: make sure you have all the important facts and documents ready.
- You will need valid identification and any other required forms to complete the process smoothly.
Accepted IDs for TM SIM Registration
- You will need valid government-issued identification to complete the registration process.
- Common alternatives include a Driver’s License, Passport, Firearms License, or IBP ID.
- Other options are NBI Clearance, OWWA ID, Philippine National ID, Police Clearance, or a PRC ID.
- You can also use a PWD Card, Senior Citizen’s Card, SSS or GSIS Card, TIN ID, UMID Card, or a Voter’s ID.
- Any other valid IDs specified by TM are also acceptable.
Required Personal Information for TM SIM Registration
- You will need to provide non-public details like your Full Name, Birthday, and Gender.
- Include your Address, Postal Code, and Mobile Number for verification.
- A Government ID Card with your ID number and a clear picture will be necessary.
- You may also need to upload a Selfie and provide proof that your info is correct.
- For businesses, additional documents like the SEC Certificate of Registration, Board Resolution, and Special Power of Attorney for the representative may be required for juridical entities or others.
Specific Requirements
For Companies
If you’re registering a SIM for an enterprise, you will need to provide the Business registration files along with the Authorized consultant’s identification. This ensures that the correct entity is responsible for the SIM card, meeting the necessary legal requirements.
For Foreigners and Minors
Foreigners or travelers using a TM SIM must register using passports and it is vital to check particular rules that may apply to them. For minors, it is essential to have consent from a parent or guardian. The specified files should be provided to complete the registration on their side.
Step-via-Step Guide to TM SIM Registration
Step 1: Purchase and Prepare
- Purchase your TM SIM card from the closest shop or a trusted seller.
- Prepare all the required documents and make sure that the necessary information is readily available. This includes personal details, identification, and any other essential files.
Step 2: Start the Registration Process
- Visit the official TM registration website or use the GlobeOne app for convenience.
- Enter your SIM card details, including your SIM card number, and begin to complete the online form with the required info.
- Accurately fill out the registration form with your personal statistics and upload documents as needed.
Step 3: Submit and Verify
- Submit the registration form after reviewing all the data for accuracy.
- Wait for the confirmation via SMS or email, which may take a few minutes or hours.
- Once confirmed, your SIM will be successfully activated and your registration will be complete!
Video Guide For TM SIM Registration
Mistakes to Avoid During TM SIM Registration
Step 1: Double-Check Your Information
- To have a seamless registration process, make sure to double-check all your entries. Any incorrect information or mistakes in your personal details can lead to registration failure.
Step 2: Ensure Clear Document Uploads
- When uploading your documents, avoid poor quality files. Make sure the images are clear and legible to prevent any issues with your document uploads.
Step 3: Handle Technical Glitches
- If you encounter any technical glitches, try refreshing the page or using a different browser to avoid delays in completing the registration.
Updating Your TM SIM Registration Details
When your life changes, like moving to a new address or changing your name or contact number, it’s important to update your TM SIM registration. To do this, simply log into your account on the TM registration site or the GlobeOne app. From there, navigate to the profile section and follow the necessary prompts to update your details. This step is essential to ensure that your contact information is always accurate and up-to-date.
Freebies and Promotions After Registering Your TM SIM
After successfully registering your TM SIM, you can expect a variety of exciting promotions and freebies designed to enhance your mobile experience. Registered users often enjoy exclusive offers such as special discounts and loyalty rewards, tailored just for them. These perks not only make you feel valued but also ensure that you get the most out of your connection. TM is known for its rewards system, which continues to evolve, offering more benefits over time. So, once you’re registered, be on the lookout for these fantastic opportunities that make being a TM customer even better!
List of Rewards by TM SIM
You can redeem the call, text, and surf rewards through the GlobeOne App or by dialing *143#. The rewards available for TM users to avail are as follows:
| Promo | Description | Required Reward Points |
|---|---|---|
| REWUNLICALL | unli calls valid for 1 day | 2 |
| SURF100MB | 100MB valid for 1 day | 2 |
| REWCOMBO2 | 20 mins, 20 SMS valid for 1 day | 2 |
| REWCOMBO4 | unli Calls and Texts to TM, valid for 1 day | 4 |
| REWCALL | unli Calls to TM and surfing 100MB, valid for 1 day | 4 |
| REWTXT | unli allnet texts and surfing 100MB, valid for 1 day | 4 |
| SURF250MB | surfing 100MB, valid for 1 day | 4 |
| REWCOMBO10 | unli calls and unli allnet texts , 100MB, valid for 1 day | 6 |
| SURF500MB | surfing 500MB, valid for 1 day | 10 |
| SURF1GB | surfing 1GB, valid for 1 day | 10 |
FAQS
What Should I Do If I Encounter an Error During TM SIM Registration?
If you face any errors during your TM SIM registration, start by refreshing the page and double-check the entered information to ensure everything is correct. If the problem persists, don’t hesitate to contact TM customer support for assistance. They can guide you through resolving the issue and completing your registration without further hassle.
How long does TM SIM activation take post-registration?
Once you register your SIM, you will typically need to wait a few minutes to a few hours for it to be activated. The confirmation message you will receive lets you know when the process is complete.
Can foreign travelers use their passports to register TM SIM cards in the Philippines?
Foreign travelers in the Philippines can register their TM SIM cards using their passports. Just ensure you meet the specific requirements to verify your identity successfully.
What to Do If You Face Problems During SIM Registration
If you're having issues with your SIM registration, don't worry—help is available! First, try dialing 808 from your TM SIM card using your phone’s dialer. This will connect you directly to customer support, where you can raise your problem and get immediate assistance. Alternatively, you can call the official hotline at (02) 7730-1500 for more detailed help. You can also reach out via the Contact Us page on the website if the issue persists. Contacting customer support early will help resolve the SIM Registration problems quickly.
Conclusion
Registering your TM SIM card is a straightforward process that comes with many benefits. By following a few simple steps, you can ensure compliance with government regulations and enjoy enhanced security and improved service. A guide to a hassle-free registration will help you unlock the full potential of your TM SIM, giving you access to exclusive promotions and offers available only to registered users.
When you activate your Smart SIM card, using official registration channels ensures a seamless process. The Smart SIM Register Online platform makes it easier than ever to complete your registration experience.